
How to Allow Microphone and Camera Access in a Browser (Windows and macOS)
When you join a conferencing app (such as Teams, Zoom, Google Meet, or Webex) in a browser, you may need to give the browser permission to use your microphone and camera. If permissions are blocked, others will not be able to hear or see you, even if your headset and webcam are connected correctly.
Follow the steps for your browser below:
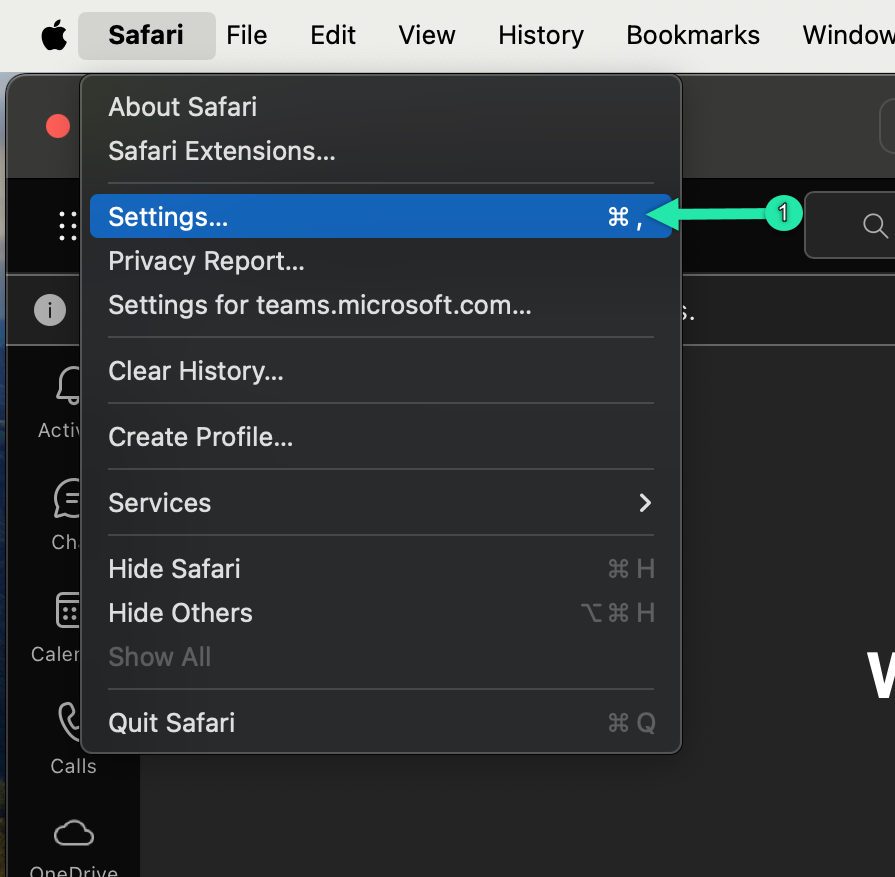
Safari (macOS only)
- With Safari open, left-click "Safari" in the top menu bar, then left-click "Settings."
- Left-click "Websites" at the top of the window.
- In the left sidebar, left-click "Microphone."
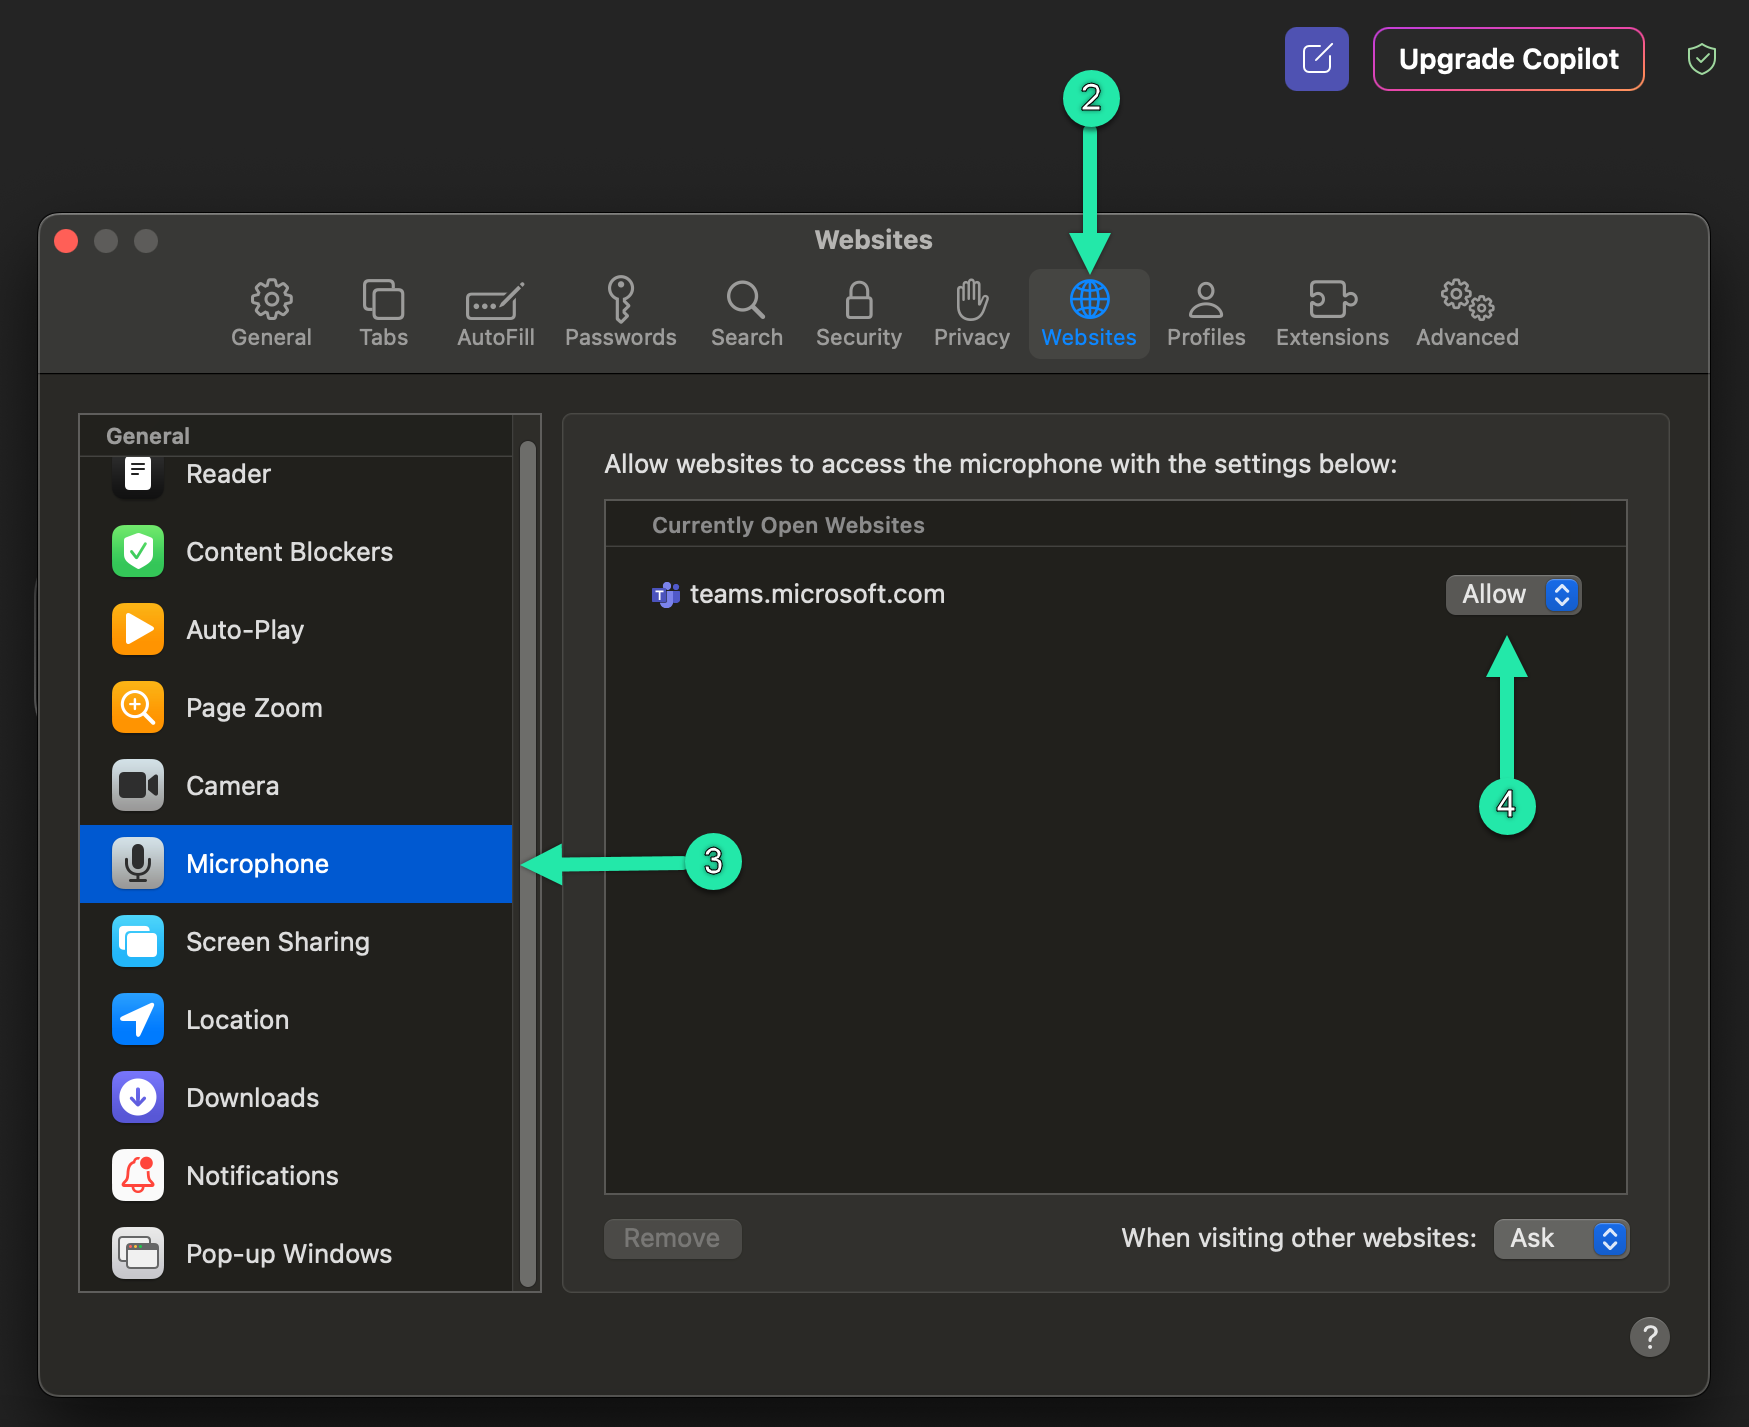
- Set Microsoft Teams (or the site you are using) to "Allow."
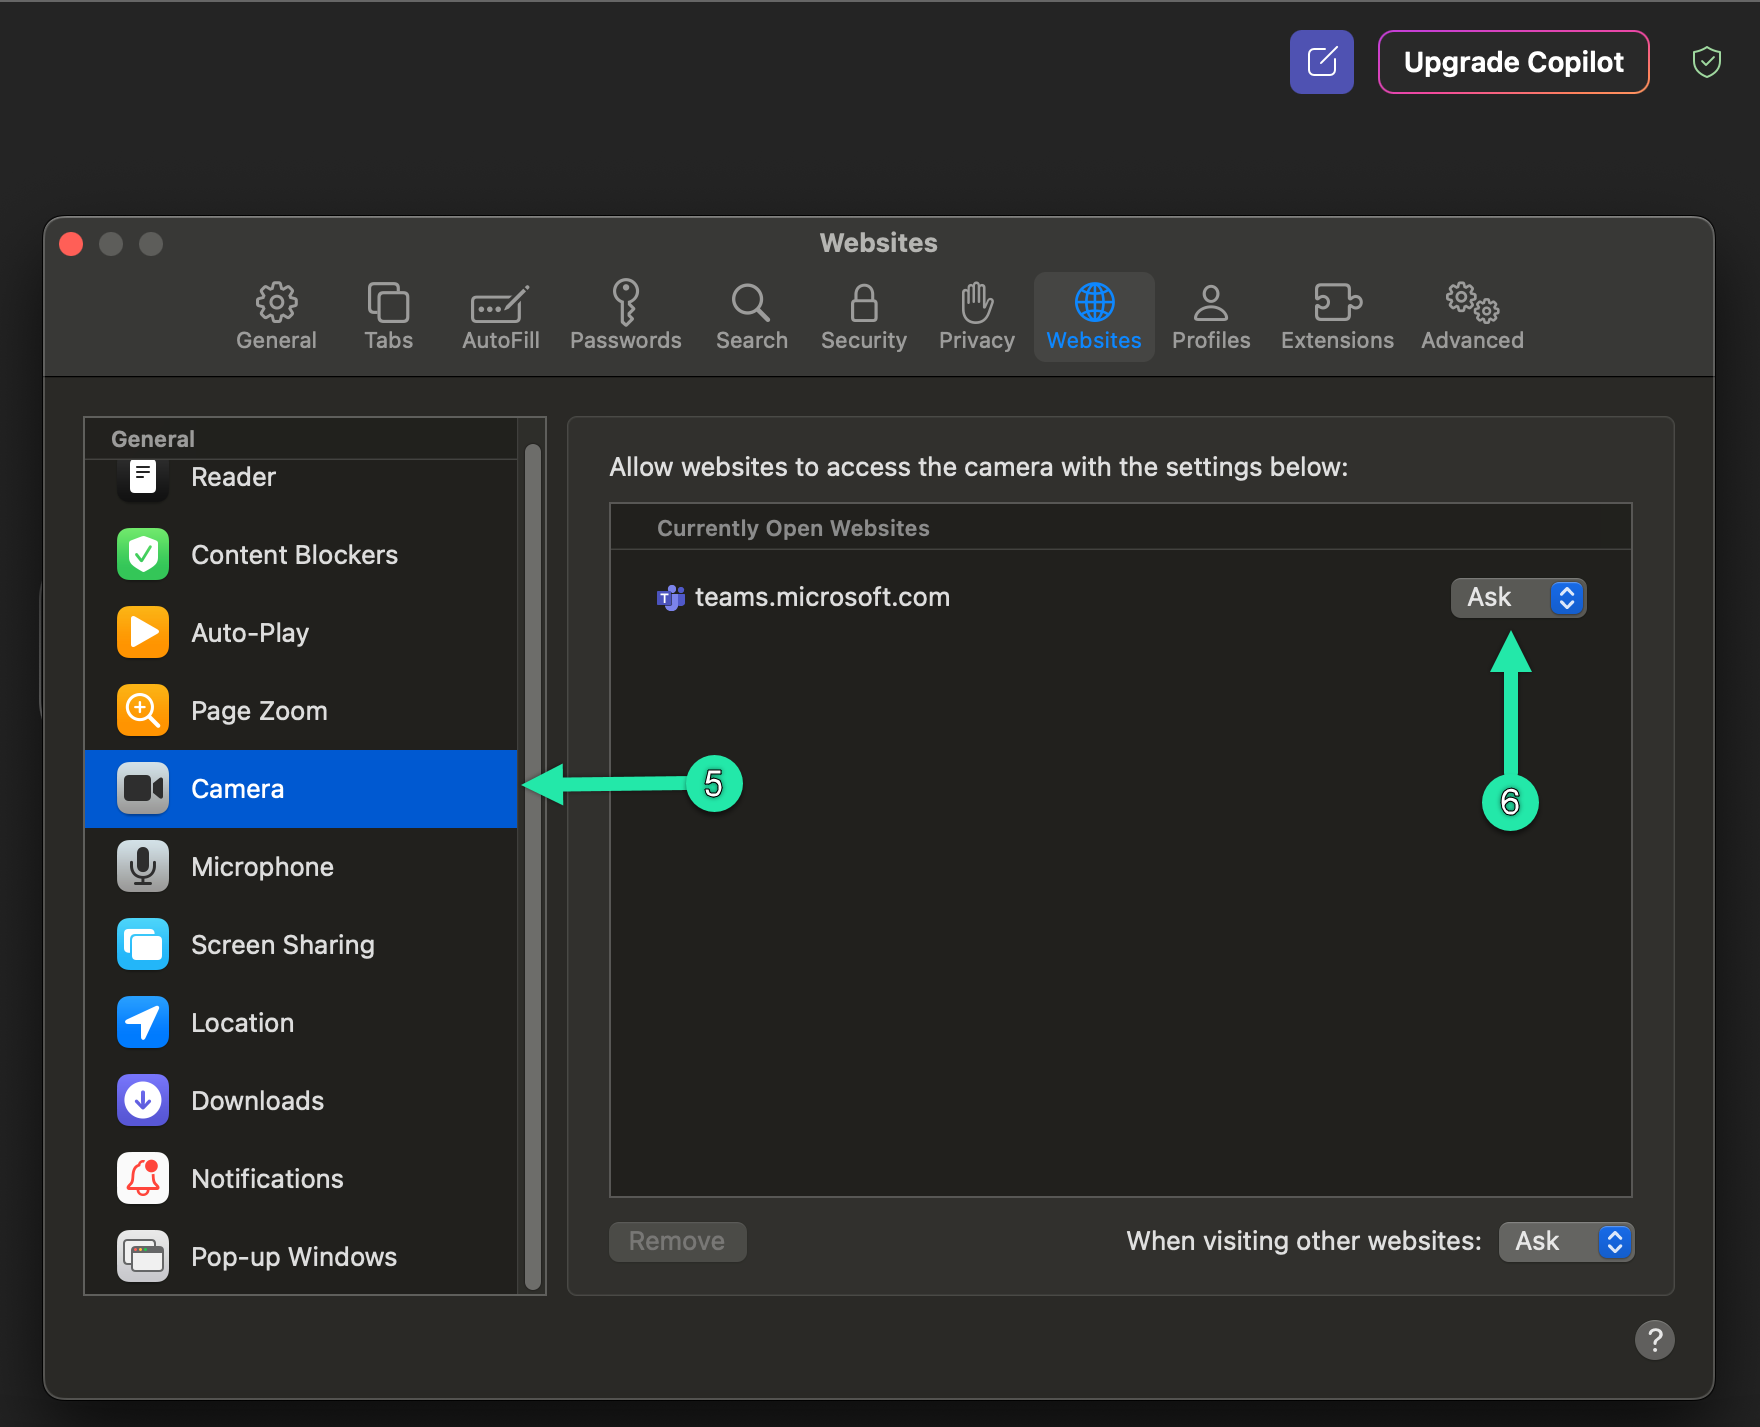
- In the left sidebar, left-click "Camera" and set it to "Allow" for the same site.
Chrome (Windows & macOS)
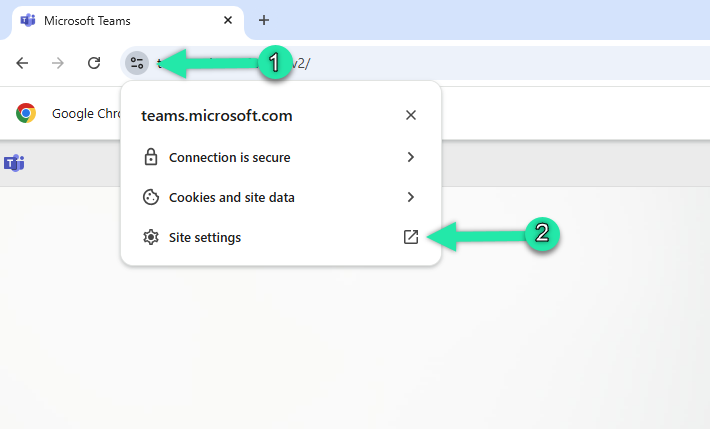
- With Chrome open on your meeting site (for example, Microsoft Teams), left-click the "lock icon" in the address bar.
- Left-click "Site settings" in the address bar.
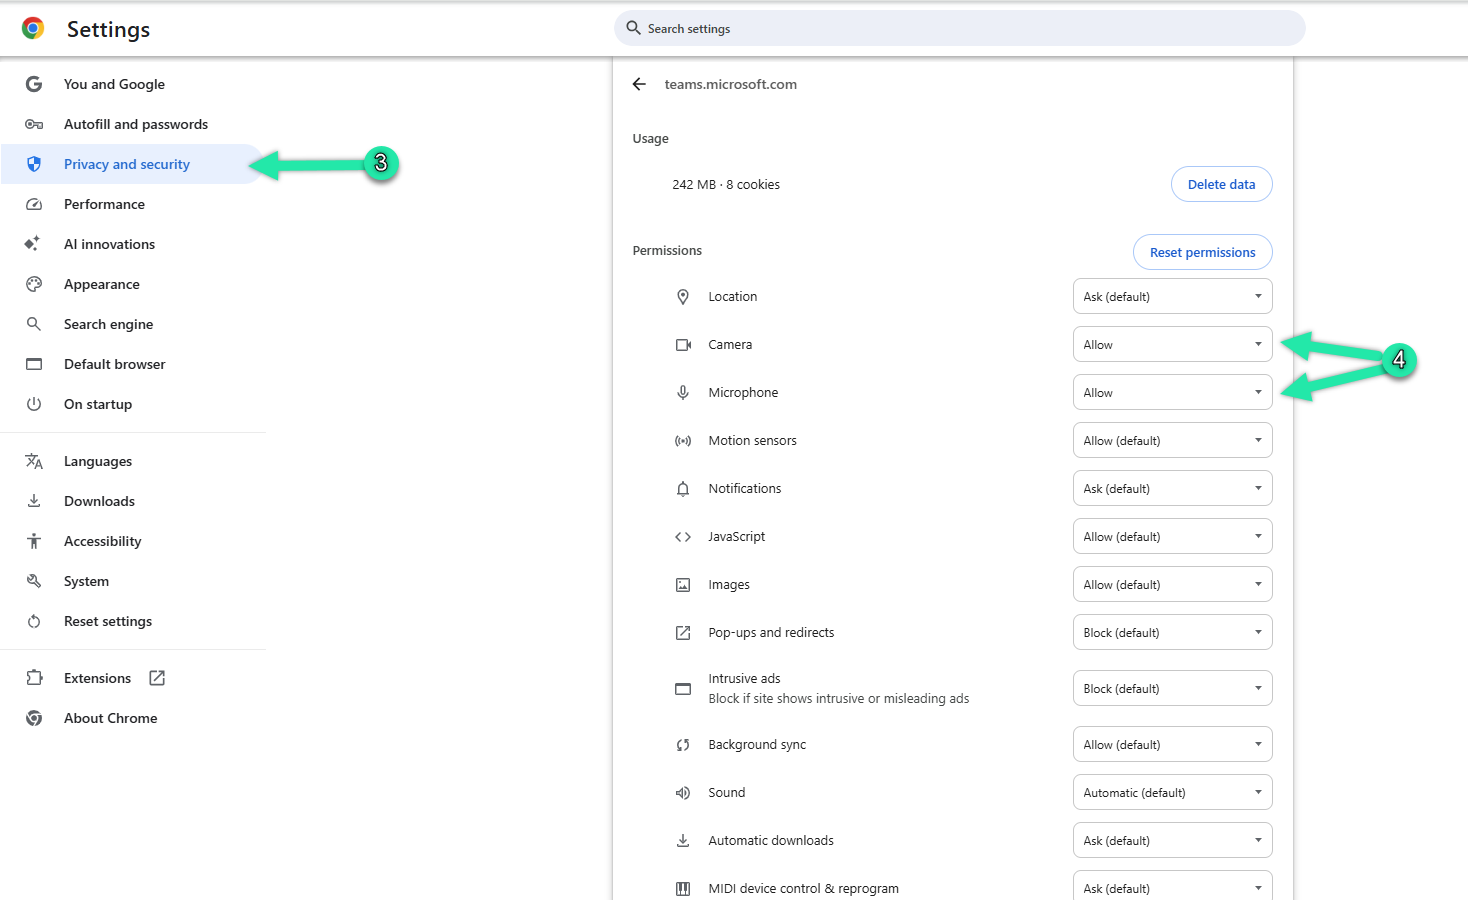
- Set both "Microphone" and "Camera" to "Allow."
- Refresh the page so the changes take effect.
Edge (Windows & macOS)
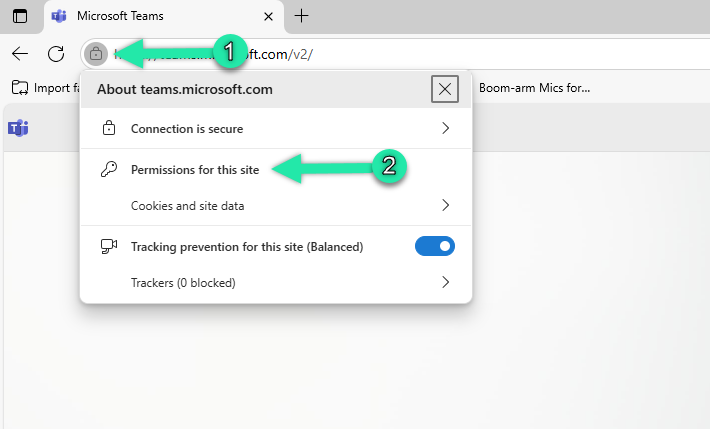
- With Microsoft Edge open on your meeting site, left-click the "lock icon" in the address bar.
- Left-click "Permissions for this site."
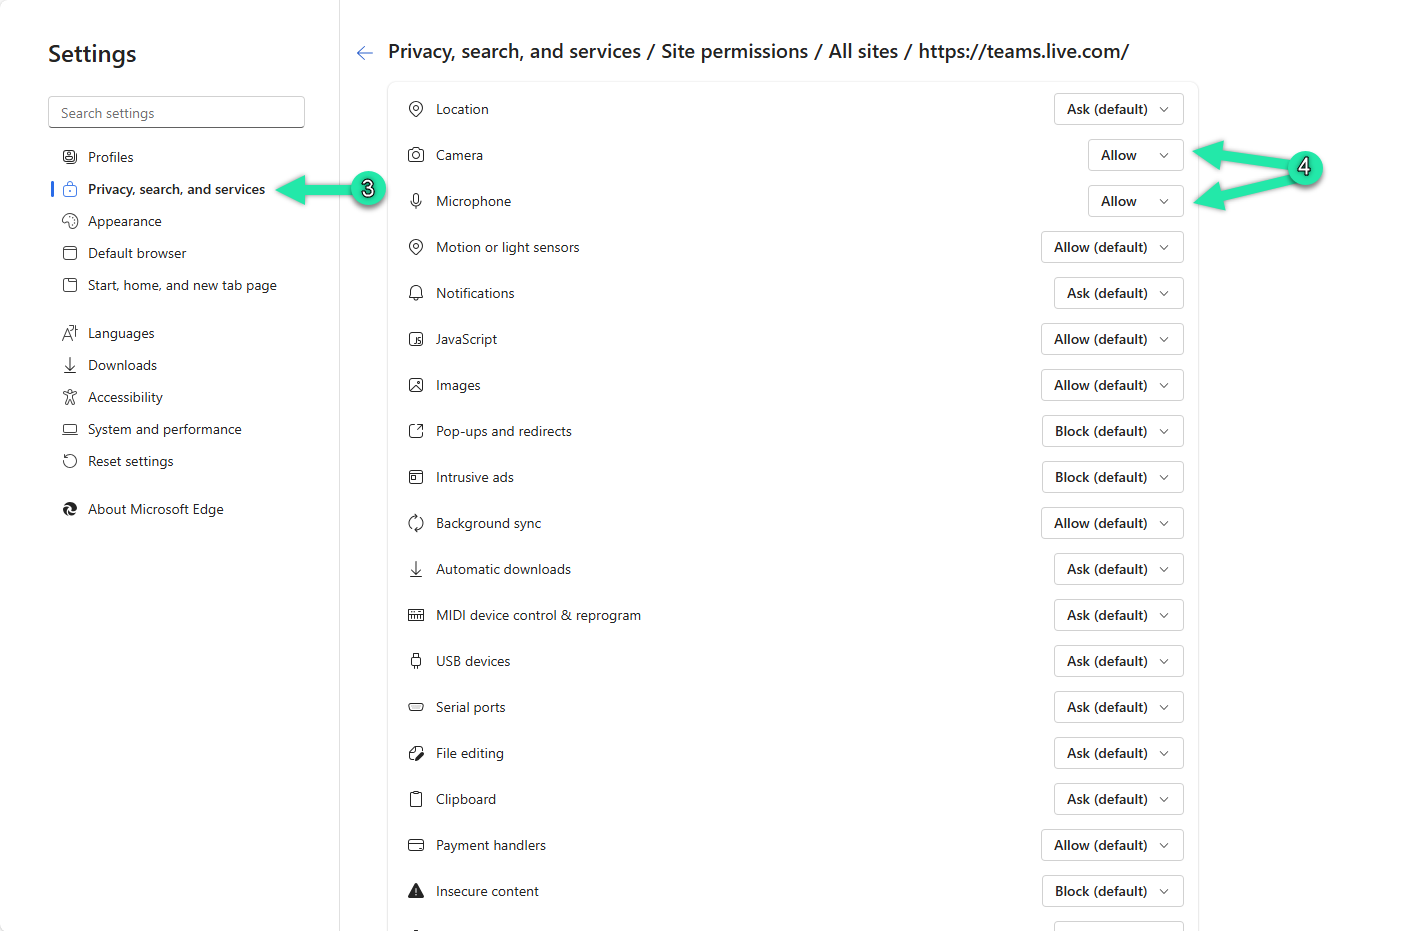
- On the left sidebar, left-click “Privacy and security.”
- Set both "Microphone" and "Camera" to "Allow," then refresh the page.
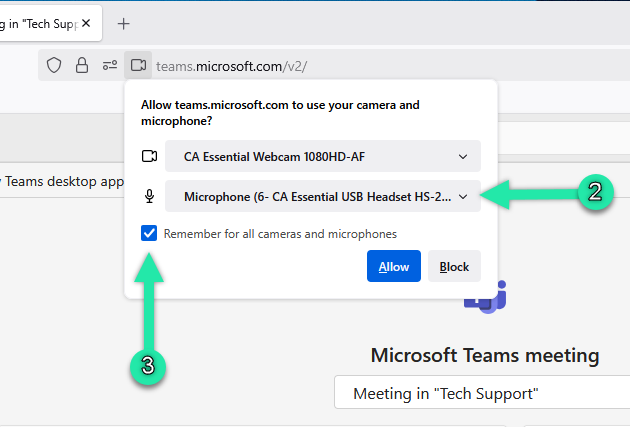
Firefox (Windows & macOS)
- With Firefox open on your meeting site, you will see a prompt asking to use your "Microphone" and "Camera."
- Select the devices you want to use and left-click "Allow."
- To save this choice for next time, check "Remember this decision" before clicking "Allow."
With microphone permissions enabled in your browser, Teams, Google Meet and other conferencing apps can access your headset correctly. If you are still having problems, continue with our guides for setting up Google Meet or Microsoft Teams.