

How to Connect a Wireless Headset on Windows 11
The steps below explain how to set up Bluetooth headsets on Windows 11.
If you have a Cyber Acoustics Bluetooth headset, such as the HS-1500BT II, we recommend using the included Bluetooth dongle for the most stable audio and full microphone support.
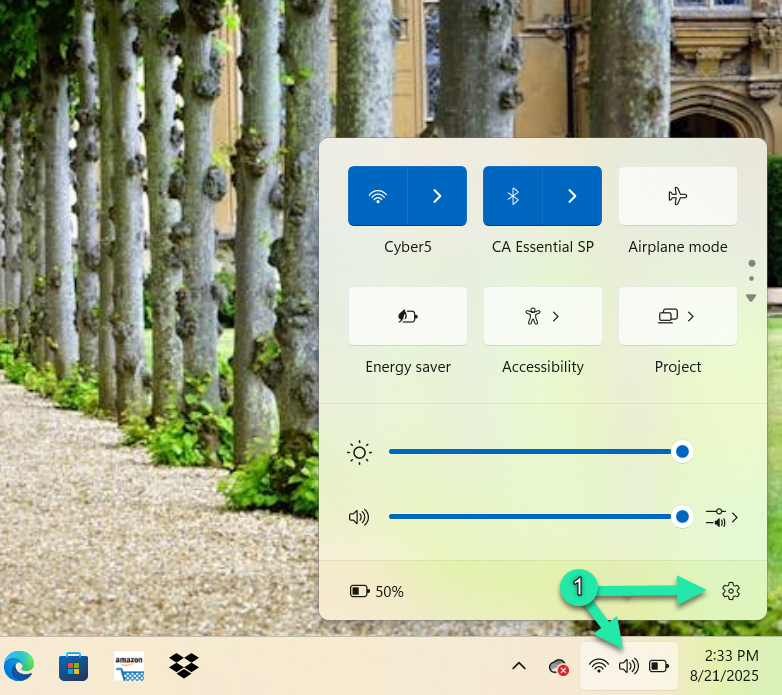
- Open the Quick Settings menu by left-clicking the network, sound, and battery area on the taskbar, then left-click the “Settings” gear icon.
- Left-click “Bluetooth & devices” on the left sidebar.
- Left-click “Add device.”

- In the window that pops up, left-click “Bluetooth,” then choose your headset from the list. Put your headset in pairing mode if it does not appear.

Note: Using built-in Bluetooth can sometimes result in poor audio quality or microphone distortion. For help improving connection quality, check out this troubleshooting guide: How to Fix the Most Annoying Bluetooth Headphone Problems.
If you want to confirm that your microphone is working correctly before joining a call, check out this article: How to Hear Your Headset Mic in Windows 11.
Once your headset is connected and recognized by Windows, you’re ready to set up audio inside your conferencing app of choice.

