
How to Check Microphone Privacy Settings for macOS (Ventura, Sonoma, Sequoia)
If people cannot hear you in Microsoft Teams on macOS, the issue is often caused by the system’s privacy settings rather than the headset itself. macOS requires you to give each app permission to use the microphone. Many users assume their headset is broken when the real problem is blocked access. Checking this setting ensures your microphone is available to Teams and prevents unnecessary frustration. If Teams does not have access, your voice will not come through on calls even if your headset is connected correctly.
Steps (macOS)
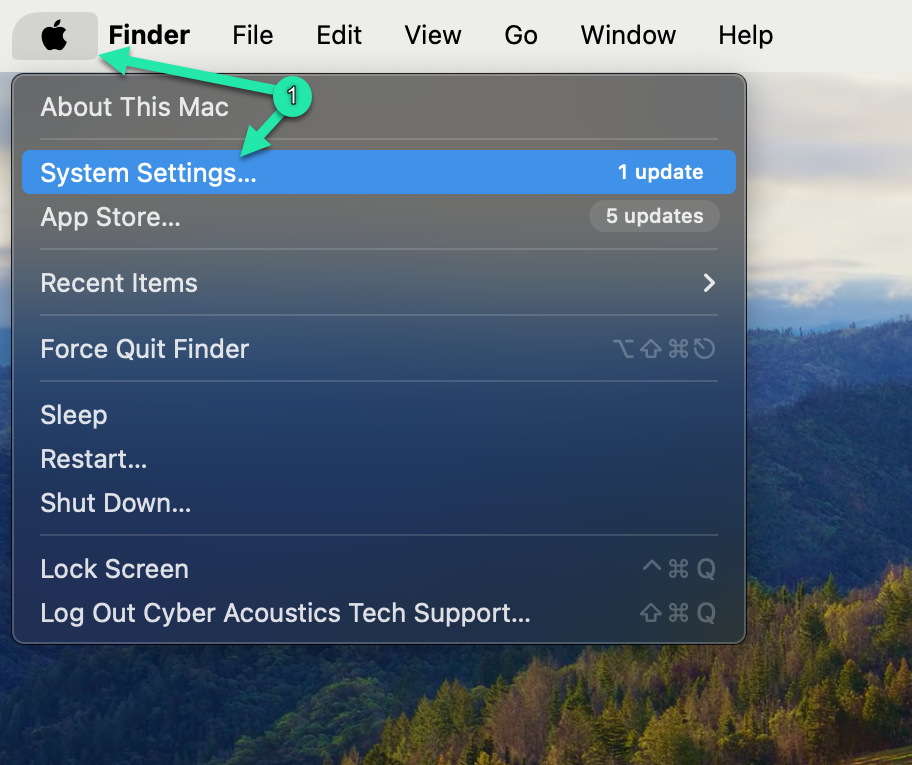
- Left-click the “Apple” menu in the top-left corner of the screen, then left-click “System Settings.”
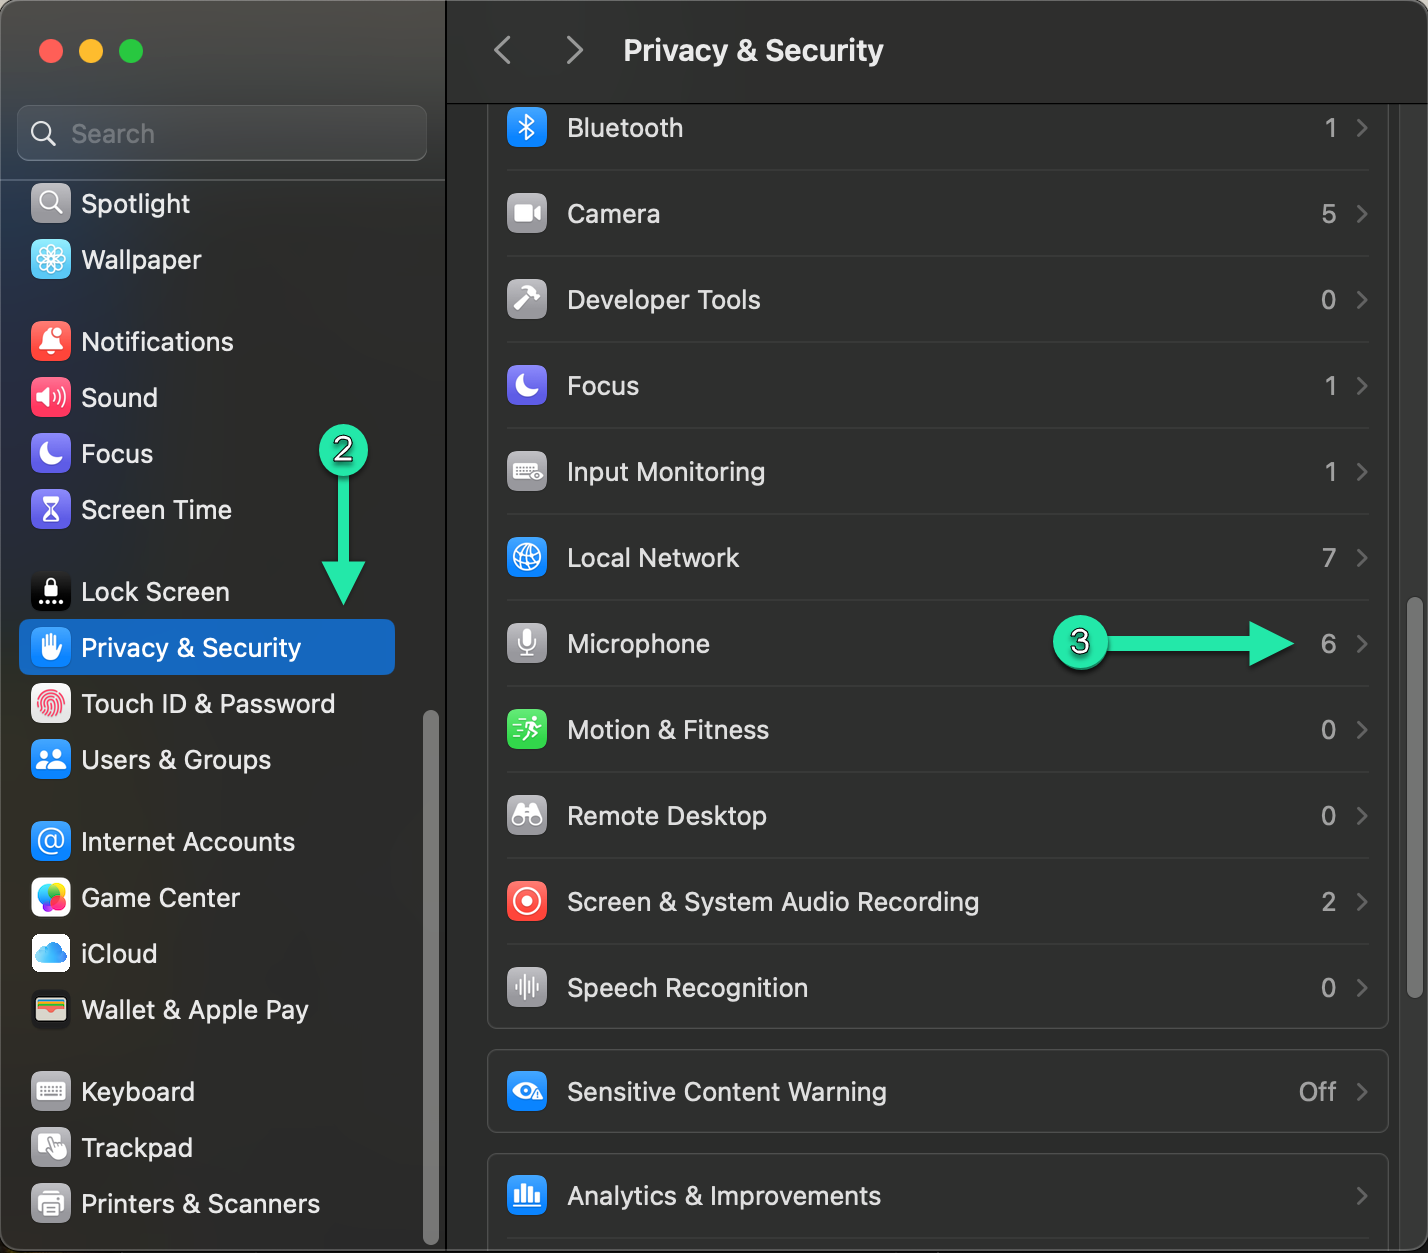
- In the sidebar, left-click “Privacy & Security.”
- On the right side, left-click “Microphone.”
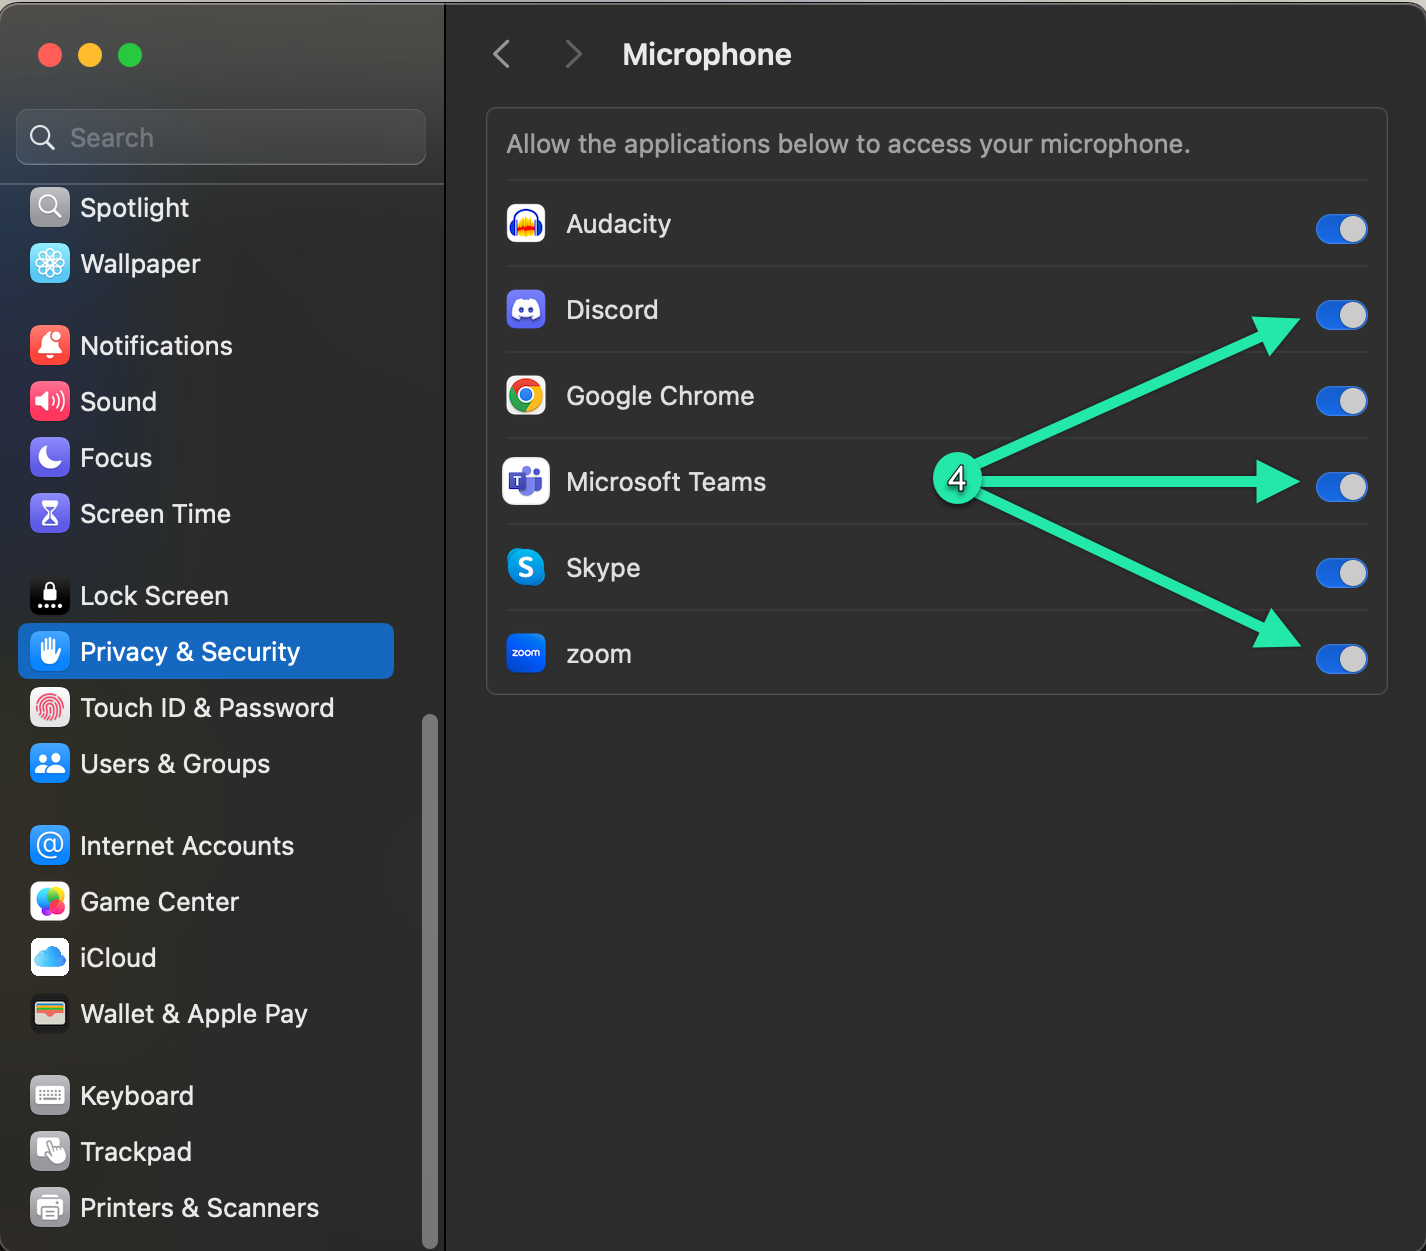
- Find your chosen conferencing app, such as Microsoft Teams, Zoom, or Discord in the list and left-click the switch so it shows On.
Note: If you are running Teams in a web browser, you must also allow the browser to use your microphone and camera. For instructions, see How to Allow Microphone and Camera Access in a Browser.
With microphone permissions enabled in macOS, Teams and other conferencing apps can access your headset correctly. If you are still having problems, continue with our guides for setting up and troubleshooting Microsoft Teams on macOS and Windows 11.