
How to Connect a Wired Headset on macOS
Follow the steps below to connect your wired headset on macOS.
Connecting Your Headset
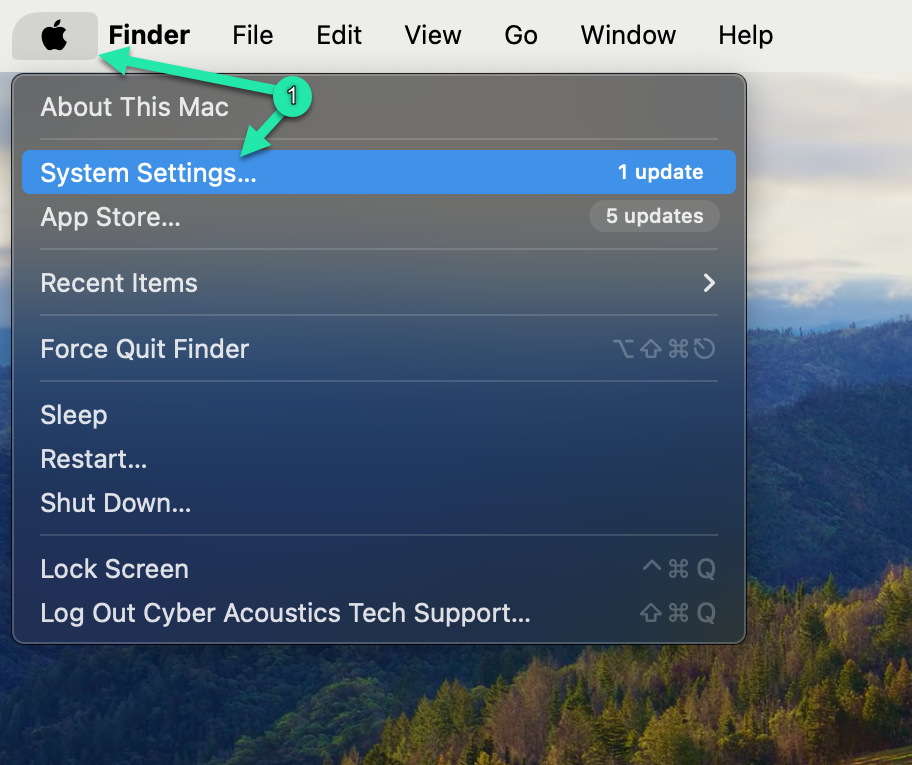
- Left-click the Apple icon in the top-left corner of the screen, then left click "System Settings."
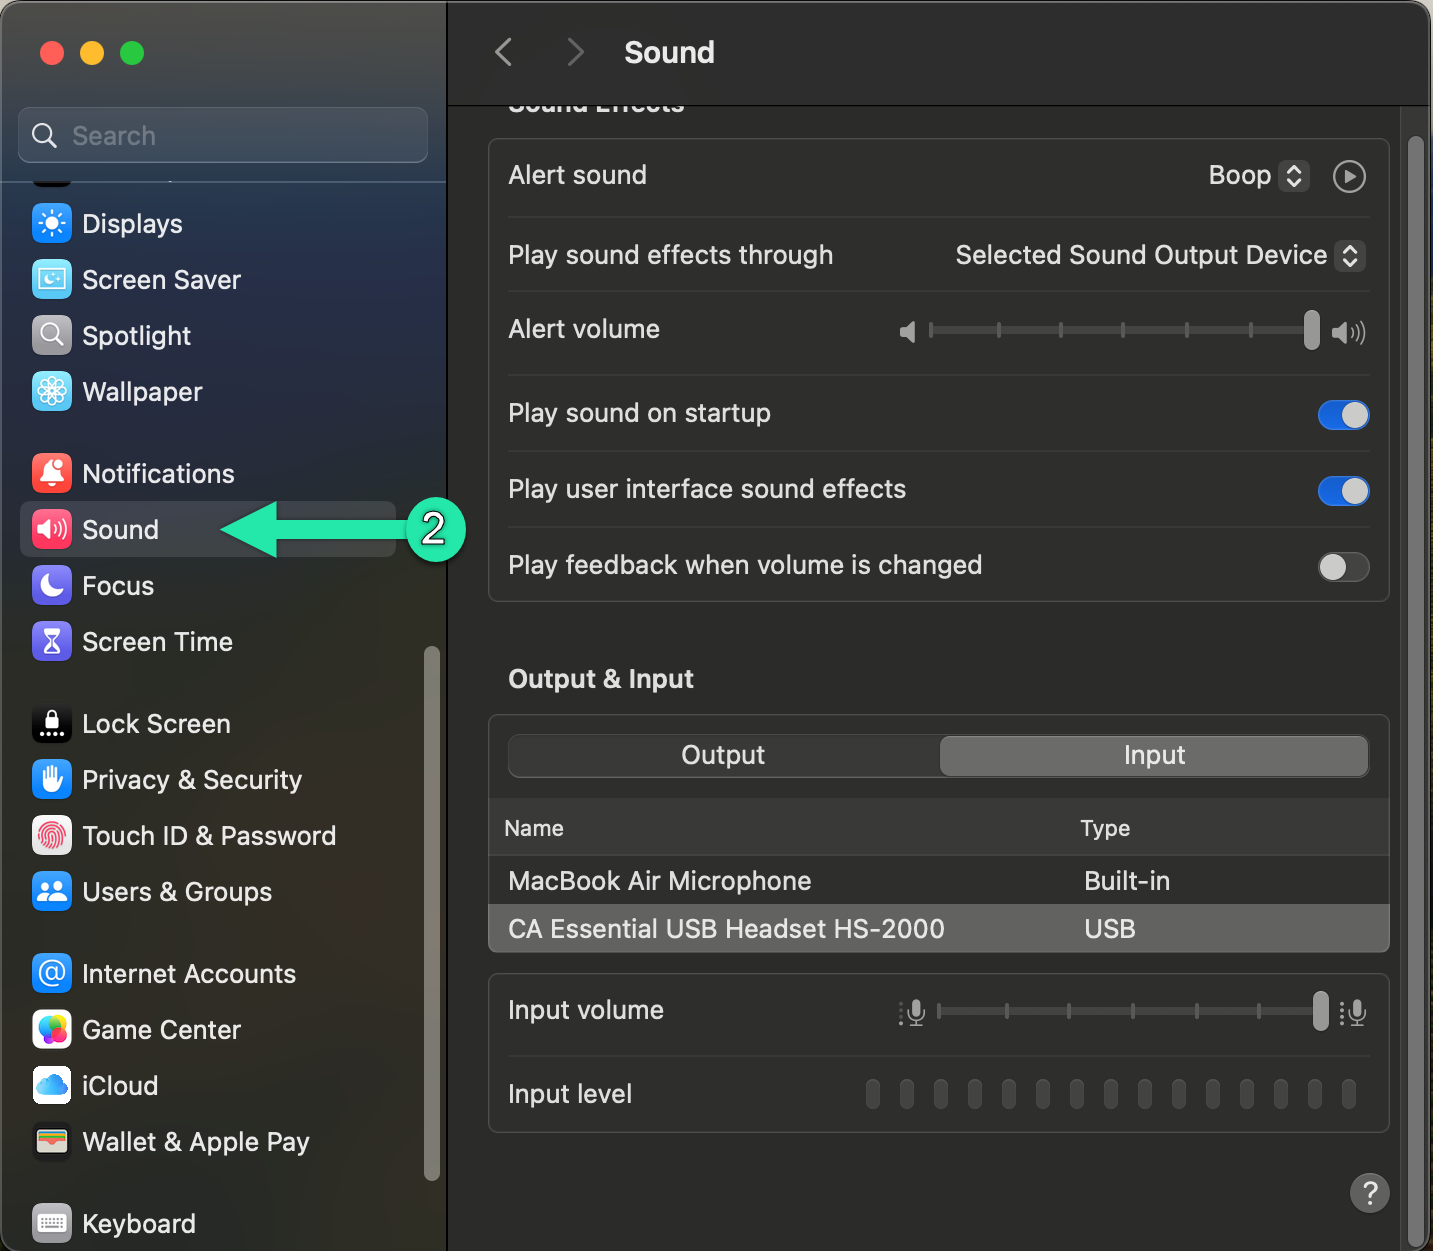
- Open Sound Settings by left-clicking “Sound” on the left sidebar.
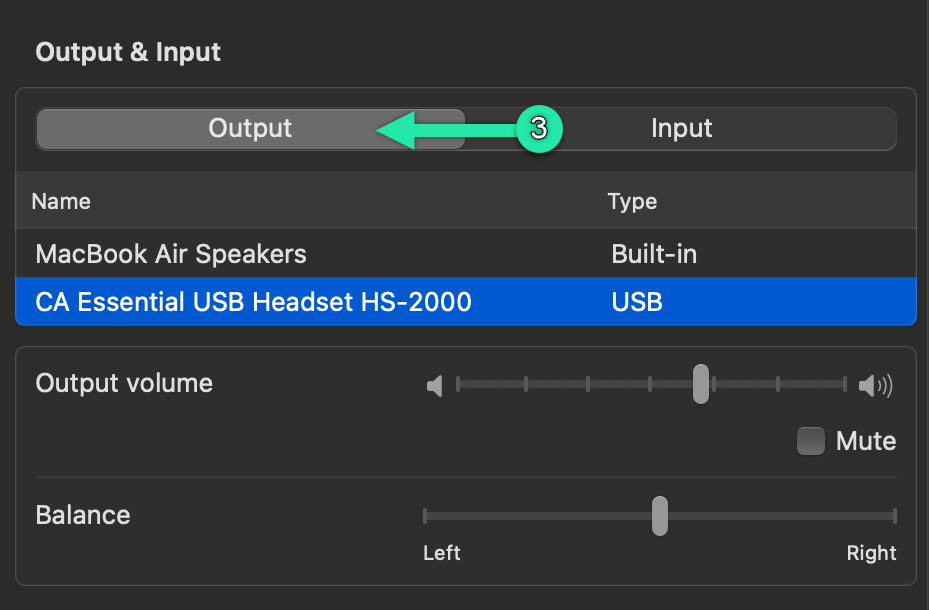
- Left-click the “Output” tab and select your headset from the list.
- Left-click the “Input” tab and select your microphone from the list.
- Test your mic using the “Input level” gauge and make sure Input volume is between 60% and 90%.

Once your headset is connected, you’re all set to configure audio in your conferencing app. Get ready for your next meeting with one of the guides below.

If you are having issues with your microphone not working, check out one of our other troubleshooting guides.