

How to Set Up a Headset in Avaya one-X Agent
Note: Avaya one-X Agent has been discontinued for new customers as of October 23, 2023, with support ending October 23, 2028. For new deployments or upgrades, Avaya recommends migrating to Avaya Workplace Client, which offers modern SIP capabilities and ongoing support.
Avaya one-X Agent supports a variety of headsets for clear, reliable call audio. Whether you use USB, Bluetooth, or a wired 3.5mm headset, a correct setup ensures your device is detected and working before your first call.
Before You Start
Before configuring Avaya one-X, connect your USB, 3.5mm, or Bluetooth headset to your computer and make sure it is selected as the default device in Settings.
Note: Your IT department or employer may have strict regulations around connectivity for security purposes. Always check with your IT team to confirm that your headset or microphone is an approved connection type before use.
If you work remotely, connect to your company’s network first, using the VPN or remote desktop tool your IT team provides. This ensures Avaya one-X Agent can detect your headset and connect to the call system correctly.
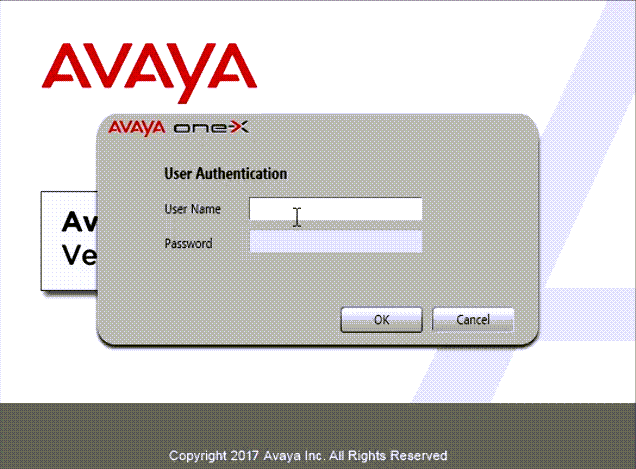
Logging In
- Open Avaya one-X Agent from the desktop icon.
- Enter your Extension and Password, then click Log In.
- If prompted, answer the verification ring on your phone to complete login.
- Once logged in, the main window will display your extension and Agent ID in the top bar.
 Sign in with your extension and password.
First-Time Configuration
Open Avaya one-X Agent and select Change Login Settings.
Telephony Tab
- Enter your extension and password
- Add the server address provided by your administrator
- Set User Type to Agent
- Choose My Computer if you will be using a headset connected to your PC
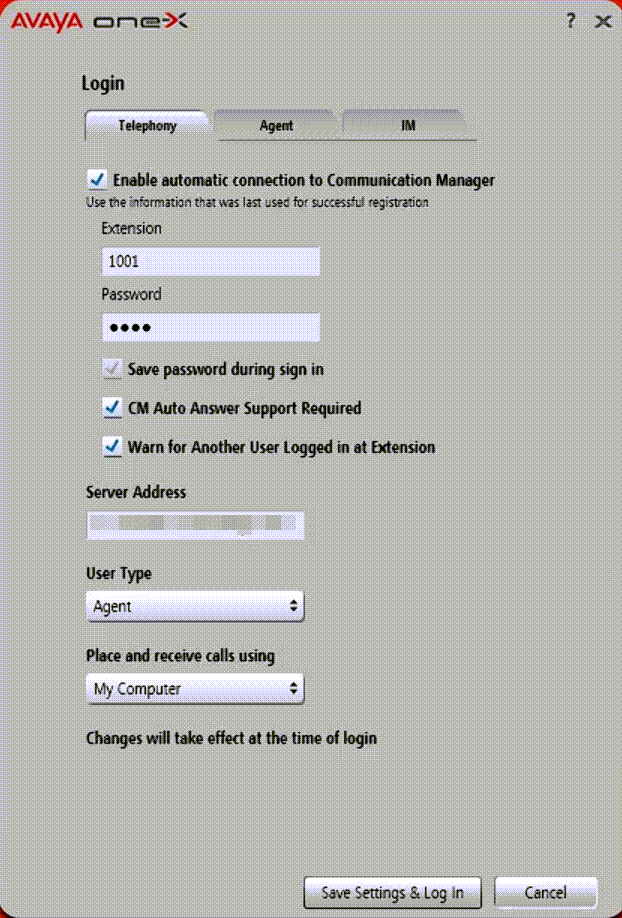 Telephony tab: choose “My Computer” and connect.
Agent Tab
- Enter your agent extension and password
- Enable ACD Login if your call center uses it
- Click OK to save. These settings only need to be changed if your login or system setup changes.
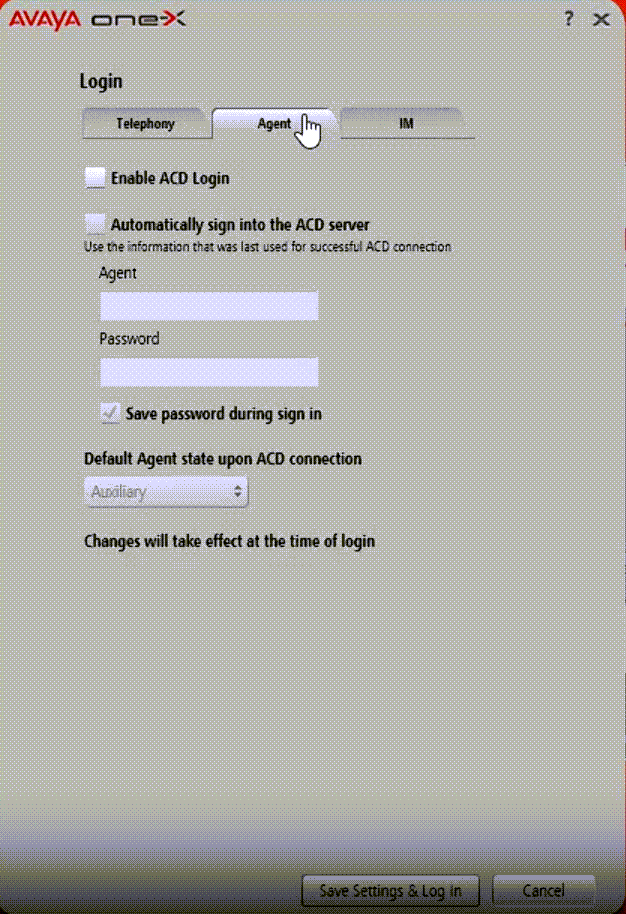 Agent tab: connect with your agent credentials.
Selecting Your Headset in Avaya one-X Agent
- In the menu, go to Tools → Preferences
- Select the Audio Devices section
- Choose your headset for both Playback (speakers) and Recording (microphone)
- Use the Test buttons to check your audio levels and make sure both sides of the call will hear clearly
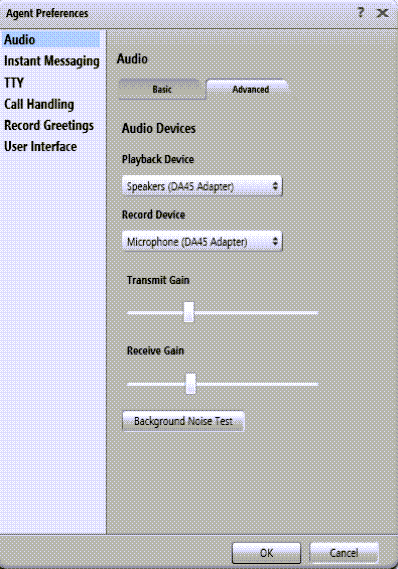 Pick your headset for both microphone and speakers.
Making a Test Call
Place a short test call to a colleague or a test extension to confirm:
- Your voice is clear
- You can hear the other party without distortion or dropouts
- The microphone is not picking up excessive background noise
Additional Support
How to Connect Your Microphone
If you aren’t sure how to connect your microphone or headset, reference one of the support blogs below:


Verify Microphone Privacy Settings
It’s critical to confirm that your operating system has the correct privacy permissions, otherwise Avaya one-X won’t be able to use your microphone.
Follow the guides below to make sure your privacy settings are properly configured:

If the audio is too low or too high, adjust the volume in your headset, the Avaya one-X Agent settings, or your OS sound controls.
Troubleshooting
If your headset is not detected or not working properly:
- Restart Avaya one-X Agent after connecting your headset
- Confirm with your IT department that your headset connection type is compatible
- For wireless devices, make sure they are connected in your operating system before logging in. If your model includes a dedicated USB dongle, use it for a more stable connection instead of direct Bluetooth to your computer
- If working remotely, check that your VPN or remote desktop software is set to pass through audio devices. For more information, see Microsoft’s guide on audio & video redirection over RDP
- Test another USB port or cable. Faulty ports or damaged cables can cause connection issues
- Use your manufacturer’s support page to download the latest audio drivers:
- Run a loopback test by recording a short clip in a sound recorder app using your headset microphone to check for clarity, dropouts, or distortion
- Disconnect unused audio devices to avoid conflicts. Having multiple headsets, webcams, or virtual audio drivers enabled can confuse Windows and Avaya. Here’s a guide on disabling unwanted audio devices in Windows 11 to clean up your output/input list
- Keep Bluetooth headsets within manufacturer recommended range of your computer and away from Wi-Fi routers or other wireless gear to reduce interference
- Reinstall Avaya one-X Agent if problems persist
Pro Tip
Tip: If you use a Cyber Acoustics headset with built-in AI noise cancellation, such as the AC-304 or AC-404, you can say goodbye to extra noise-cancellation subscriptions like Krisp. These headset microphones use advanced onboard AI processing to filter out background noise so callers hear only your voice.
To get the best results, disable any software-based noise-cancellation or “background noise suppression” features in your operating system or apps (for example, Windows “Audio Enhancements,” Dell Optimizer’s “Remove My Background Noise,” or third-party apps like Krisp or Zoom’s “Noise Suppression”). Leaving these on can cause audio conflicts or make your voice sound unnatural because both systems are trying to process the same signal.
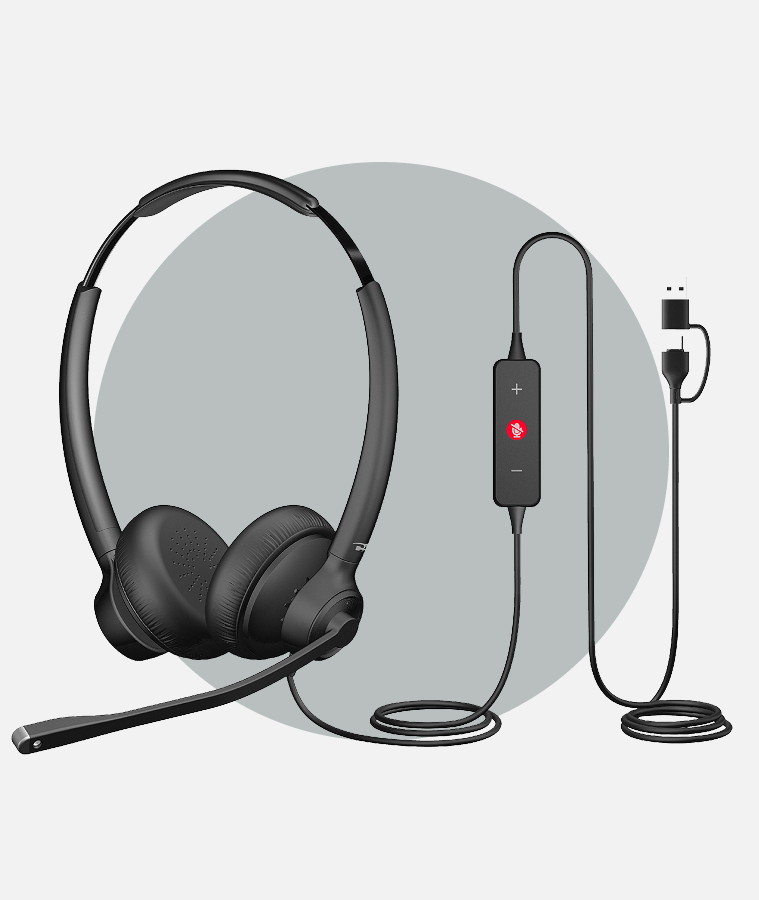
 AC-304 & AC-304C
 AC-404
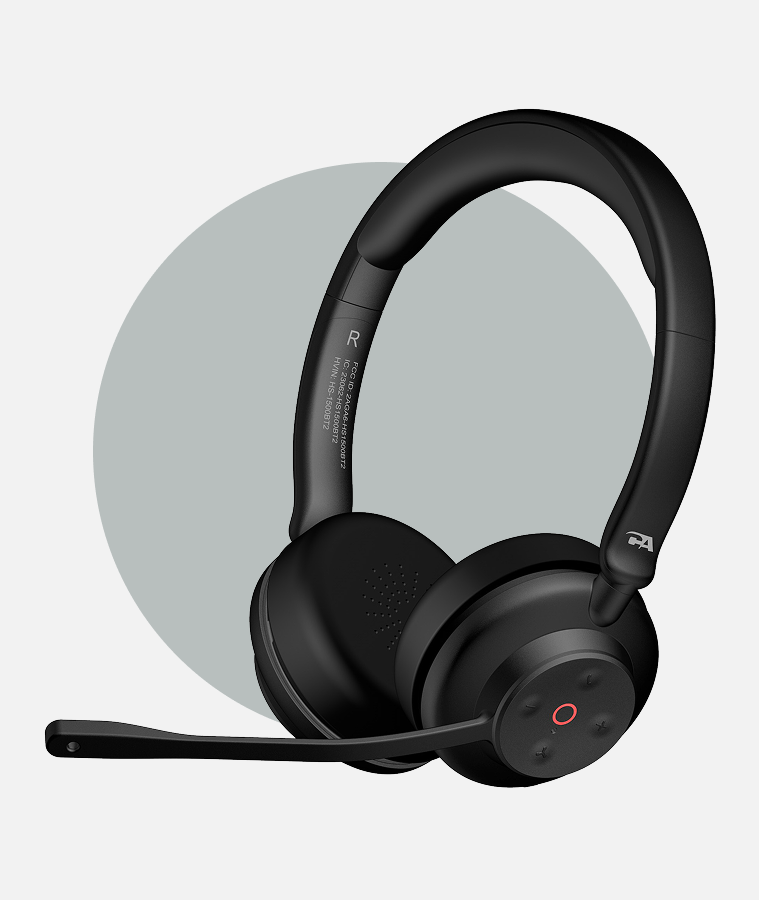 HS-1500BT II
Want to hear the difference for yourself?
Try our interactive noise cancellation demo and see how Cyber Acoustics headsets block out background noise in real-world environments.
You can’t always control the noise around you, but you can control how you sound. Choose the headset that fits your space and let it handle the rest.